使用 Prometheus 监控 APISIX 指标
Prometheus 是一种常用的系统监控和告警工具包。它收集并存储多维时间序列数据,例如带有键值对标签的指标。
APISIX 能够以低延迟向 Prometheus 公开大量指标,从而支持持续监控和诊断。
本指南介绍如何启用 prometheus 插件,与 Prometheus 和 Grafana 服务集成,以收集并可视化 APISIX HTTP 指标。

前置条件
启用 Prometheus 插件
全局启用 prometheus 插件。你也可以仅在某个路由上启用该插件。
- Admin API
- ADC
curl "http://127.0.0.1:9180/apisix/admin/global_rules/prometheus" -X PUT \
  -H "Content-Type: application/json" \
  -d '{
    "plugins": {
      "prometheus": {}
    }
  }'
APISIX 收集内部运行时指标,并默认通过端口 9091 和路径 /apisix/prometheus/metrics 公开这些指标。可以在配置文件中自定义端口和路径。
global_rules:
  prometheus: {}
将配置同步到 APISIX:
adc sync -f adc.yaml
APISIX 收集内部运行时指标,并默认通过端口 9091 和路径 /apisix/prometheus/metrics 公开这些指标。可以在配置文件中自定义端口和路径。
向 /apisix/prometheus/metrics 路径发送请求,从 APISIX 获取指标:
curl "http://127.0.0.1:9091/apisix/prometheus/metrics"
你应该看到类似以下的指标列表:
# HELP apisix_etcd_modify_indexes Etcd modify index for APISIX keys
# TYPE apisix_etcd_modify_indexes gauge
apisix_etcd_modify_indexes{key="consumers"} 0
apisix_etcd_modify_indexes{key="global_rules"} 0
apisix_etcd_modify_indexes{key="max_modify_index"} 16
apisix_etcd_modify_indexes{key="prev_index"} 15
apisix_etcd_modify_indexes{key="protos"} 0
apisix_etcd_modify_indexes{key="routes"} 16
apisix_etcd_modify_indexes{key="services"} 0
apisix_etcd_modify_indexes{key="ssls"} 0
apisix_etcd_modify_indexes{key="stream_routes"} 0
apisix_etcd_modify_indexes{key="upstreams"} 0
apisix_etcd_modify_indexes{key="x_etcd_index"} 16
# HELP apisix_etcd_reachable Config server etcd reachable from APISIX, 0 is unreachable
# TYPE apisix_etcd_reachable gauge
apisix_etcd_reachable 1
...
# HELP apisix_http_status HTTP status codes per service in APISIX
# TYPE apisix_http_status counter
...
配置 Prometheus
在 Prometheus 中,目标是 Prometheus 抓取指标的端点。可以将 APISIX 指标端点配置为 Prometheus 目标,以便从中收集指标。
创建配置文件 prometheus.yml:
cat > prometheus.yml <<'EOF'
global:
  scrape_interval: 15s

scrape_configs:
  - job_name: apisix
    metrics_path: /apisix/prometheus/metrics
    static_configs:
      - targets:
          - apisix-quickstart:9091
EOF
创建数据卷并启动 Prometheus。主机上的端口 9092 映射到容器内端口 9090 上的 Prometheus Web 界面:
docker volume create apisix-quickstart-prometheus-data

docker run -d --name apisix-quickstart-prometheus \
  --network apisix-quickstart-net \
  -p 9092:9090 \
  -v "$(pwd)/prometheus.yml:/etc/prometheus/prometheus.yml:ro" \
  -v apisix-quickstart-prometheus-data:/prometheus \
  prom/prometheus:v3.7.3
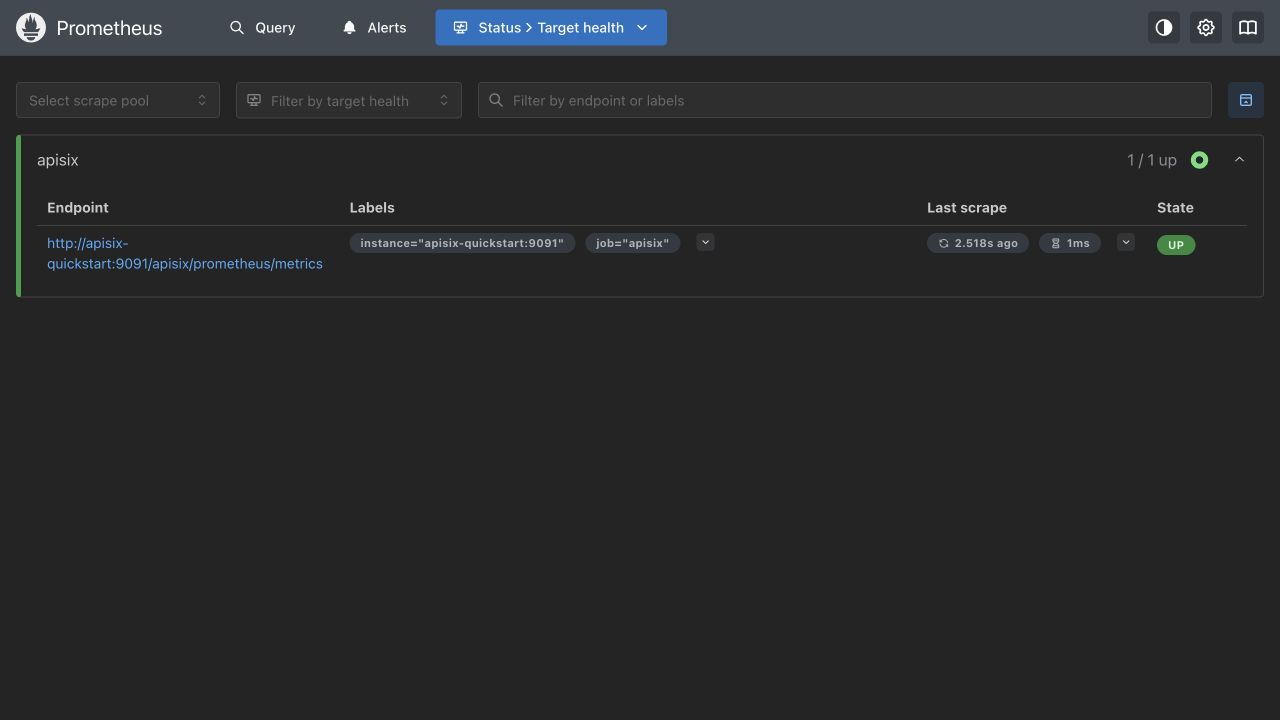
打开 Prometheus 目标页面。apisix 目标的状态应为 UP。
配置 Grafana
Grafana 可以可视化 Prometheus 中保存的指标。
创建数据卷,并在同一个 Docker 网络上启动 Grafana:
docker volume create apisix-quickstart-grafana-data

docker run -d --name apisix-quickstart-grafana \
  --network apisix-quickstart-net \
  -p 3000:3000 \
  -v apisix-quickstart-grafana-data:/var/lib/grafana \
  grafana/grafana:13.1.0
打开 Grafana,使用默认用户名和密码 admin 登录,并按提示修改密码。
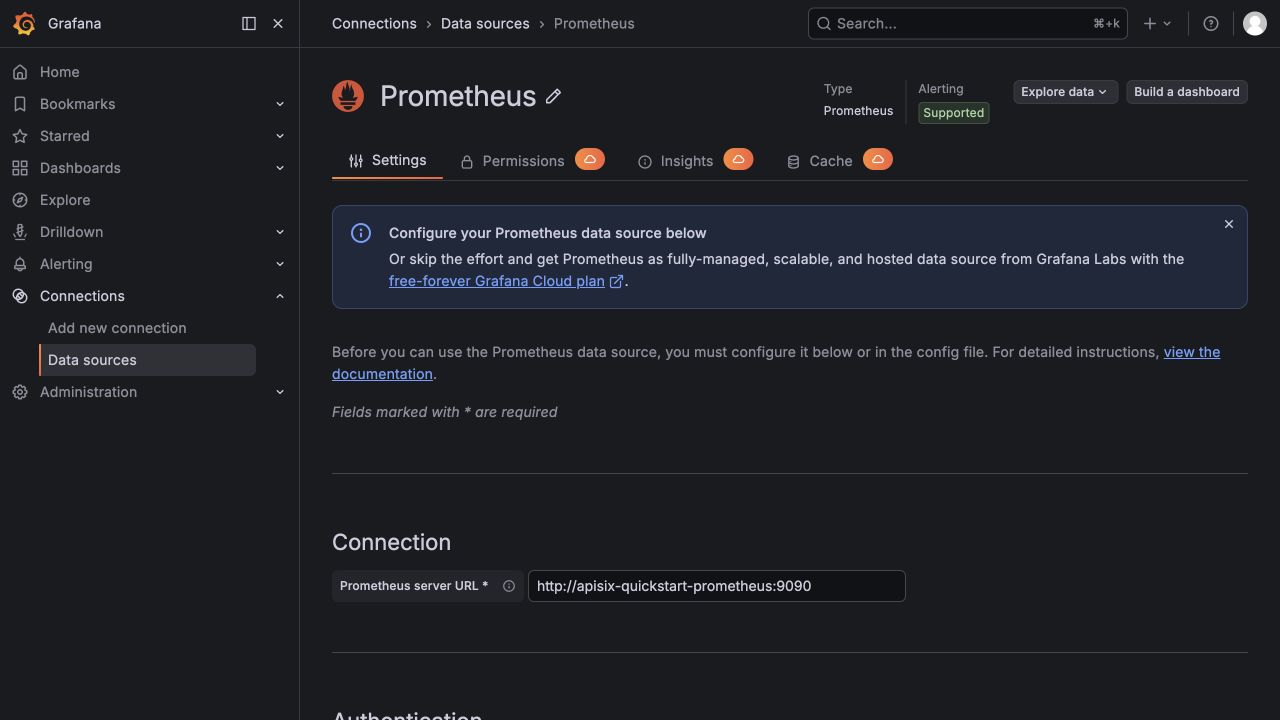
前往 Connections > Data sources,添加 Prometheus 数据源,并将其 URL 设为 http://apisix-quickstart-prometheus:9090。由于 Grafana 从 Docker 网络内部发起请求,该 URL 使用 Prometheus 容器名称和容器端口。选择 Save & test,确认 Grafana 能够查询 Prometheus。
生成网关流量,并等待 Prometheus 完成一次抓取:
for i in {1..100}; do
  curl -sS "http://127.0.0.1:9080/ip" > /dev/null
done

sleep 15
下载 Apache APISIX 源代码树中为此版本维护的 Dashboard:
curl -fL "https://raw.githubusercontent.com/apache/apisix/3.19.0/docs/assets/other/json/apisix-grafana-dashboard.json" \
  -o apisix-grafana-dashboard.json
Grafana 目录中的 Dashboard 11719 页面只列出了对 APISIX 2.10.x 的兼容性,并依赖旧版 Grafana 面板。对于本指南公开的指标,请使用上面的版本化 Dashboard JSON。
在 Grafana 中前往 Dashboards > New > Import,上传 apisix-grafana-dashboard.json,选择 Prometheus 数据源,然后选择 Import。
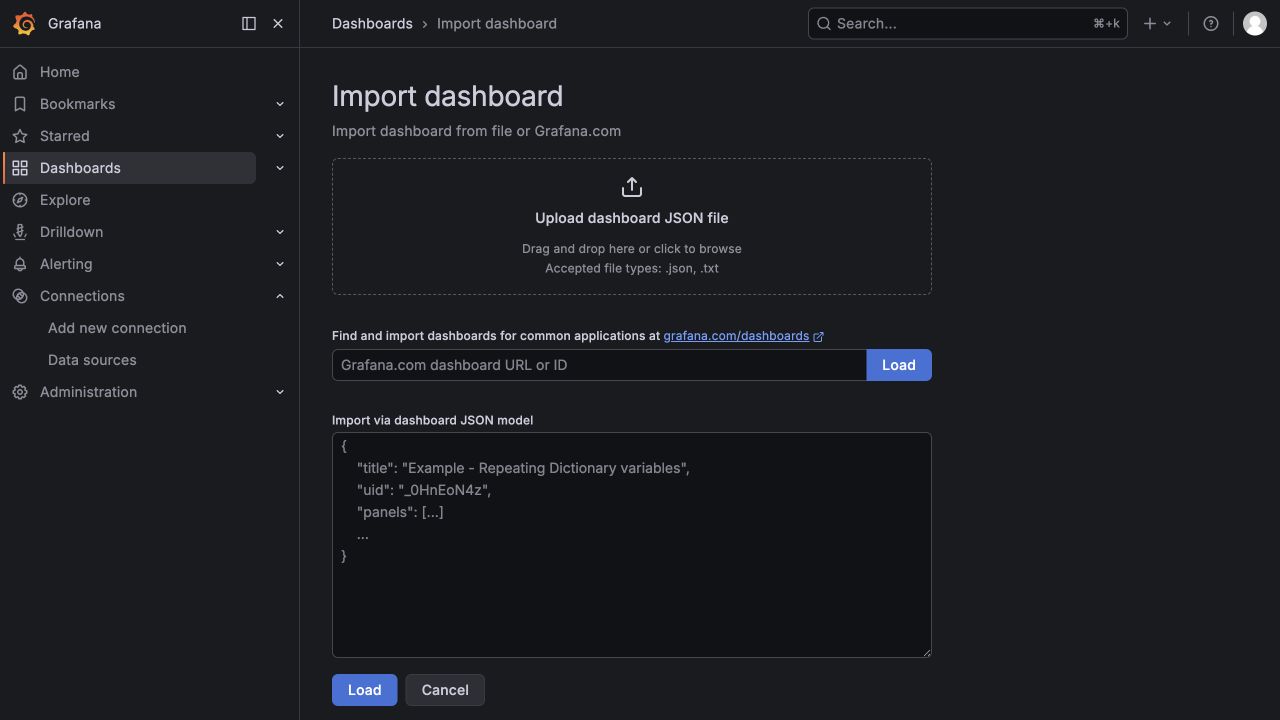
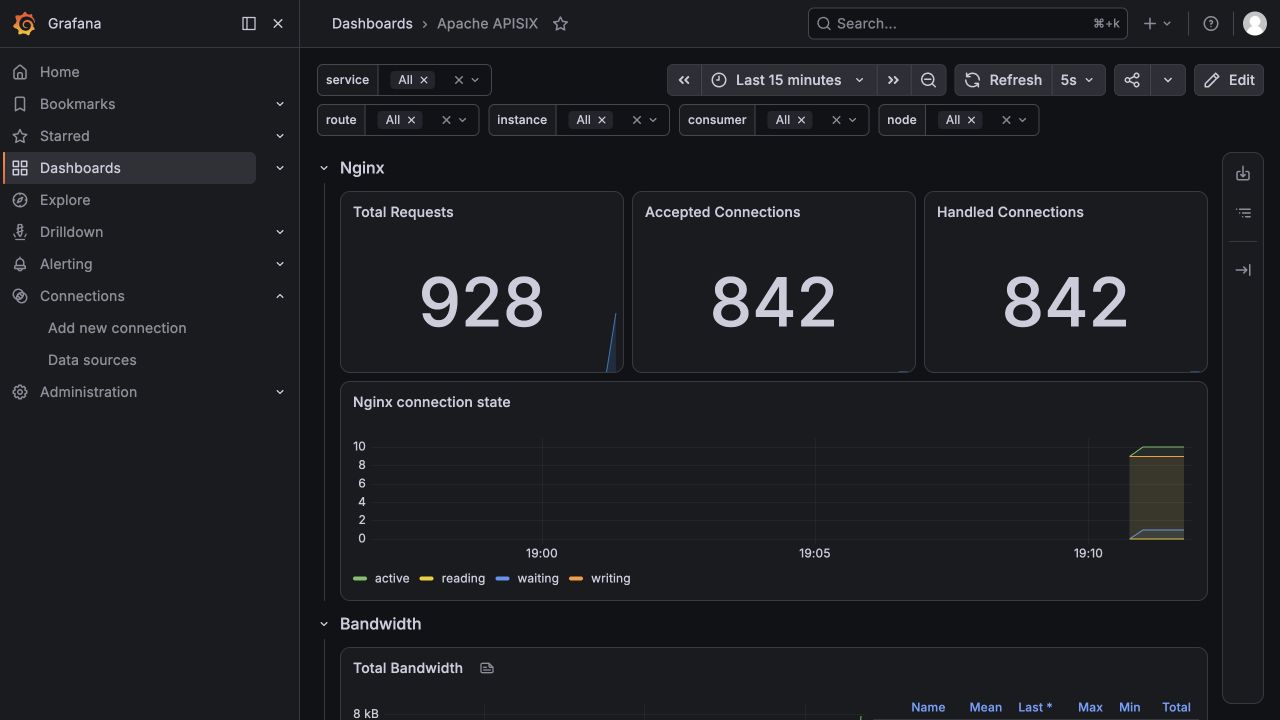
Dashboard 应显示上面生成的请求,并展示 APISIX 连接、请求、延迟、带宽、etcd 和共享字典指标。
如果你已抓取 apisix_llm_latency,请更新遗漏 type 标签的 PromQL、记录规则和 Grafana 面板。该直方图现在将 type="total"(完整响应延迟)与 type="ttft"(流式请求的首 Token 时间)区分开来;不带 type 的选择器会同时匹配二者。需要保持此前的总延迟语义时,请使用 type="total":
histogram_quantile(0.99, sum by (le, route_id) (rate(apisix_llm_latency_bucket{type="total"}[5m])))
每个流式请求会记录一个 total 观测值和一个 ttft 观测值,因此流式流量的样本数和时间序列基数都会增加。
降低指标基数
高基数标签(例如频繁变化的上游节点地址)会产生大量时间序列。可配置 prometheus 插件元数据,将所选标签值替换为空字符串,同时保留指标架构中的标签:
curl "http://127.0.0.1:9180/apisix/admin/plugin_metadata/prometheus" -X PUT \
  -H "X-API-KEY: ${ADMIN_API_KEY}" \
  -d '{
    "disabled_labels": {
      "http_status": ["node"],
      "http_latency": ["node"]
    }
  }'
生成流量后再次获取指标端点。受影响的时间序列仍应保留 node 标签,但其值为空:
apisix_http_status{code="200",route="1",matched_uri="/ip",matched_host="",service="",consumer="",node="",request_type="traditional_http",request_llm_model="",llm_model="",response_source="upstream"} 100
APISIX 会拒绝禁用用于区分不同测量值的结构化标签,例如 HTTP 状态的 code,以及延迟和带宽的 type。各指标支持的标签请参阅 prometheus 插件元数据参考。
监控 TCP 和 UDP 流量
启用流代理,并将 prometheus 添加到现有 stream_plugins 列表。下面的最小列表足以用于本示例;请保留部署中使用的其他流插件:
apisix:
  proxy_mode: http&stream
  stream_proxy:
    tcp:
      - 9100

stream_plugins:
  - prometheus
重新加载 APISIX,然后创建一个流路由:
curl "http://127.0.0.1:9180/apisix/admin/stream_routes" -X PUT \
  -H "X-API-KEY: ${ADMIN_API_KEY}" \
  -d '{
    "id": "prometheus-stream-route",
    "plugins": {
      "prometheus": {}
    },
    "upstream": {
      "type": "roundrobin",
      "nodes": {
        "httpbin.org:80": 1
      }
    }
  }'
通过流监听器发送流量,并抓取指标端点:
curl -i "http://127.0.0.1:9100"
curl "http://127.0.0.1:9091/apisix/prometheus/metrics" | grep apisix_stream
输出应包含连接总数、活跃会话、终止状态和带宽计数器:
apisix_stream_connection_total{route="prometheus-stream-route"} 1
apisix_stream_active_connections{listen_addr="0.0.0.0:9100"} 0
apisix_stream_status{code="200",listen_addr="0.0.0.0:9100",node="54.237.103.220:80"} 1
apisix_stream_bandwidth{listen_addr="0.0.0.0:9100",type="ingress",side="downstream"} 78
上游地址和字节数取决于请求。请求关闭后,活跃会话值为 0。活跃会话和带宽指标使用 nginx_config.stream.metrics_zone_size 配置的共享内存大小,默认值为 1m。
区分 WebSocket 会话与 HTTP 延迟
WebSocket 成功升级后,HTTP 状态、延迟和带宽指标使用 request_type="websocket" 标签,不会归入 traditional_http。请求延迟包含升级后连接的整个生命周期,而不是一次短暂的 HTTP 往返。
例如,以下 PromQL 查询按路由计算普通 HTTP 请求延迟的第 95 百分位:
histogram_quantile(
  0.95,
  sum by (le, route) (
    rate(apisix_http_latency_bucket{type="request",request_type="traditional_http"}[5m])
  )
)
如需包含 HTTP 和 AI 请求但排除 WebSocket 会话,请将请求类型匹配器替换为 request_type!="websocket"。升级时请检查 Dashboard、告警和记录规则中的选择器,包括此前将 WebSocket 升级计为普通 HTTP 流量的查询。
请先关闭测试 WebSocket 会话,再检查这些按请求记录的指标,因为指标会在会话结束后写入。有关完整的延迟标签,请参阅 prometheus 插件参考。
下一步
现在,你已了解如何使用 Prometheus 监控 APISIX 指标,并在 Grafana 中将其可视化。有关更多配置选项,请参阅 prometheus 插件文档。