Workspace Management
Workspace management
Users can separate resources by creating workspace by referring to the internal or project situation of the enterprise. Users with different permissions have different operational resource ranges in each workspace, and the data between each workspace is independent of each other, which is convenient for users to manage.
Query workspace
Click the Workspaces button on the left to enter the list.
The list page will display multiple resources that have been created, through the query area, you can query through the following parameters:
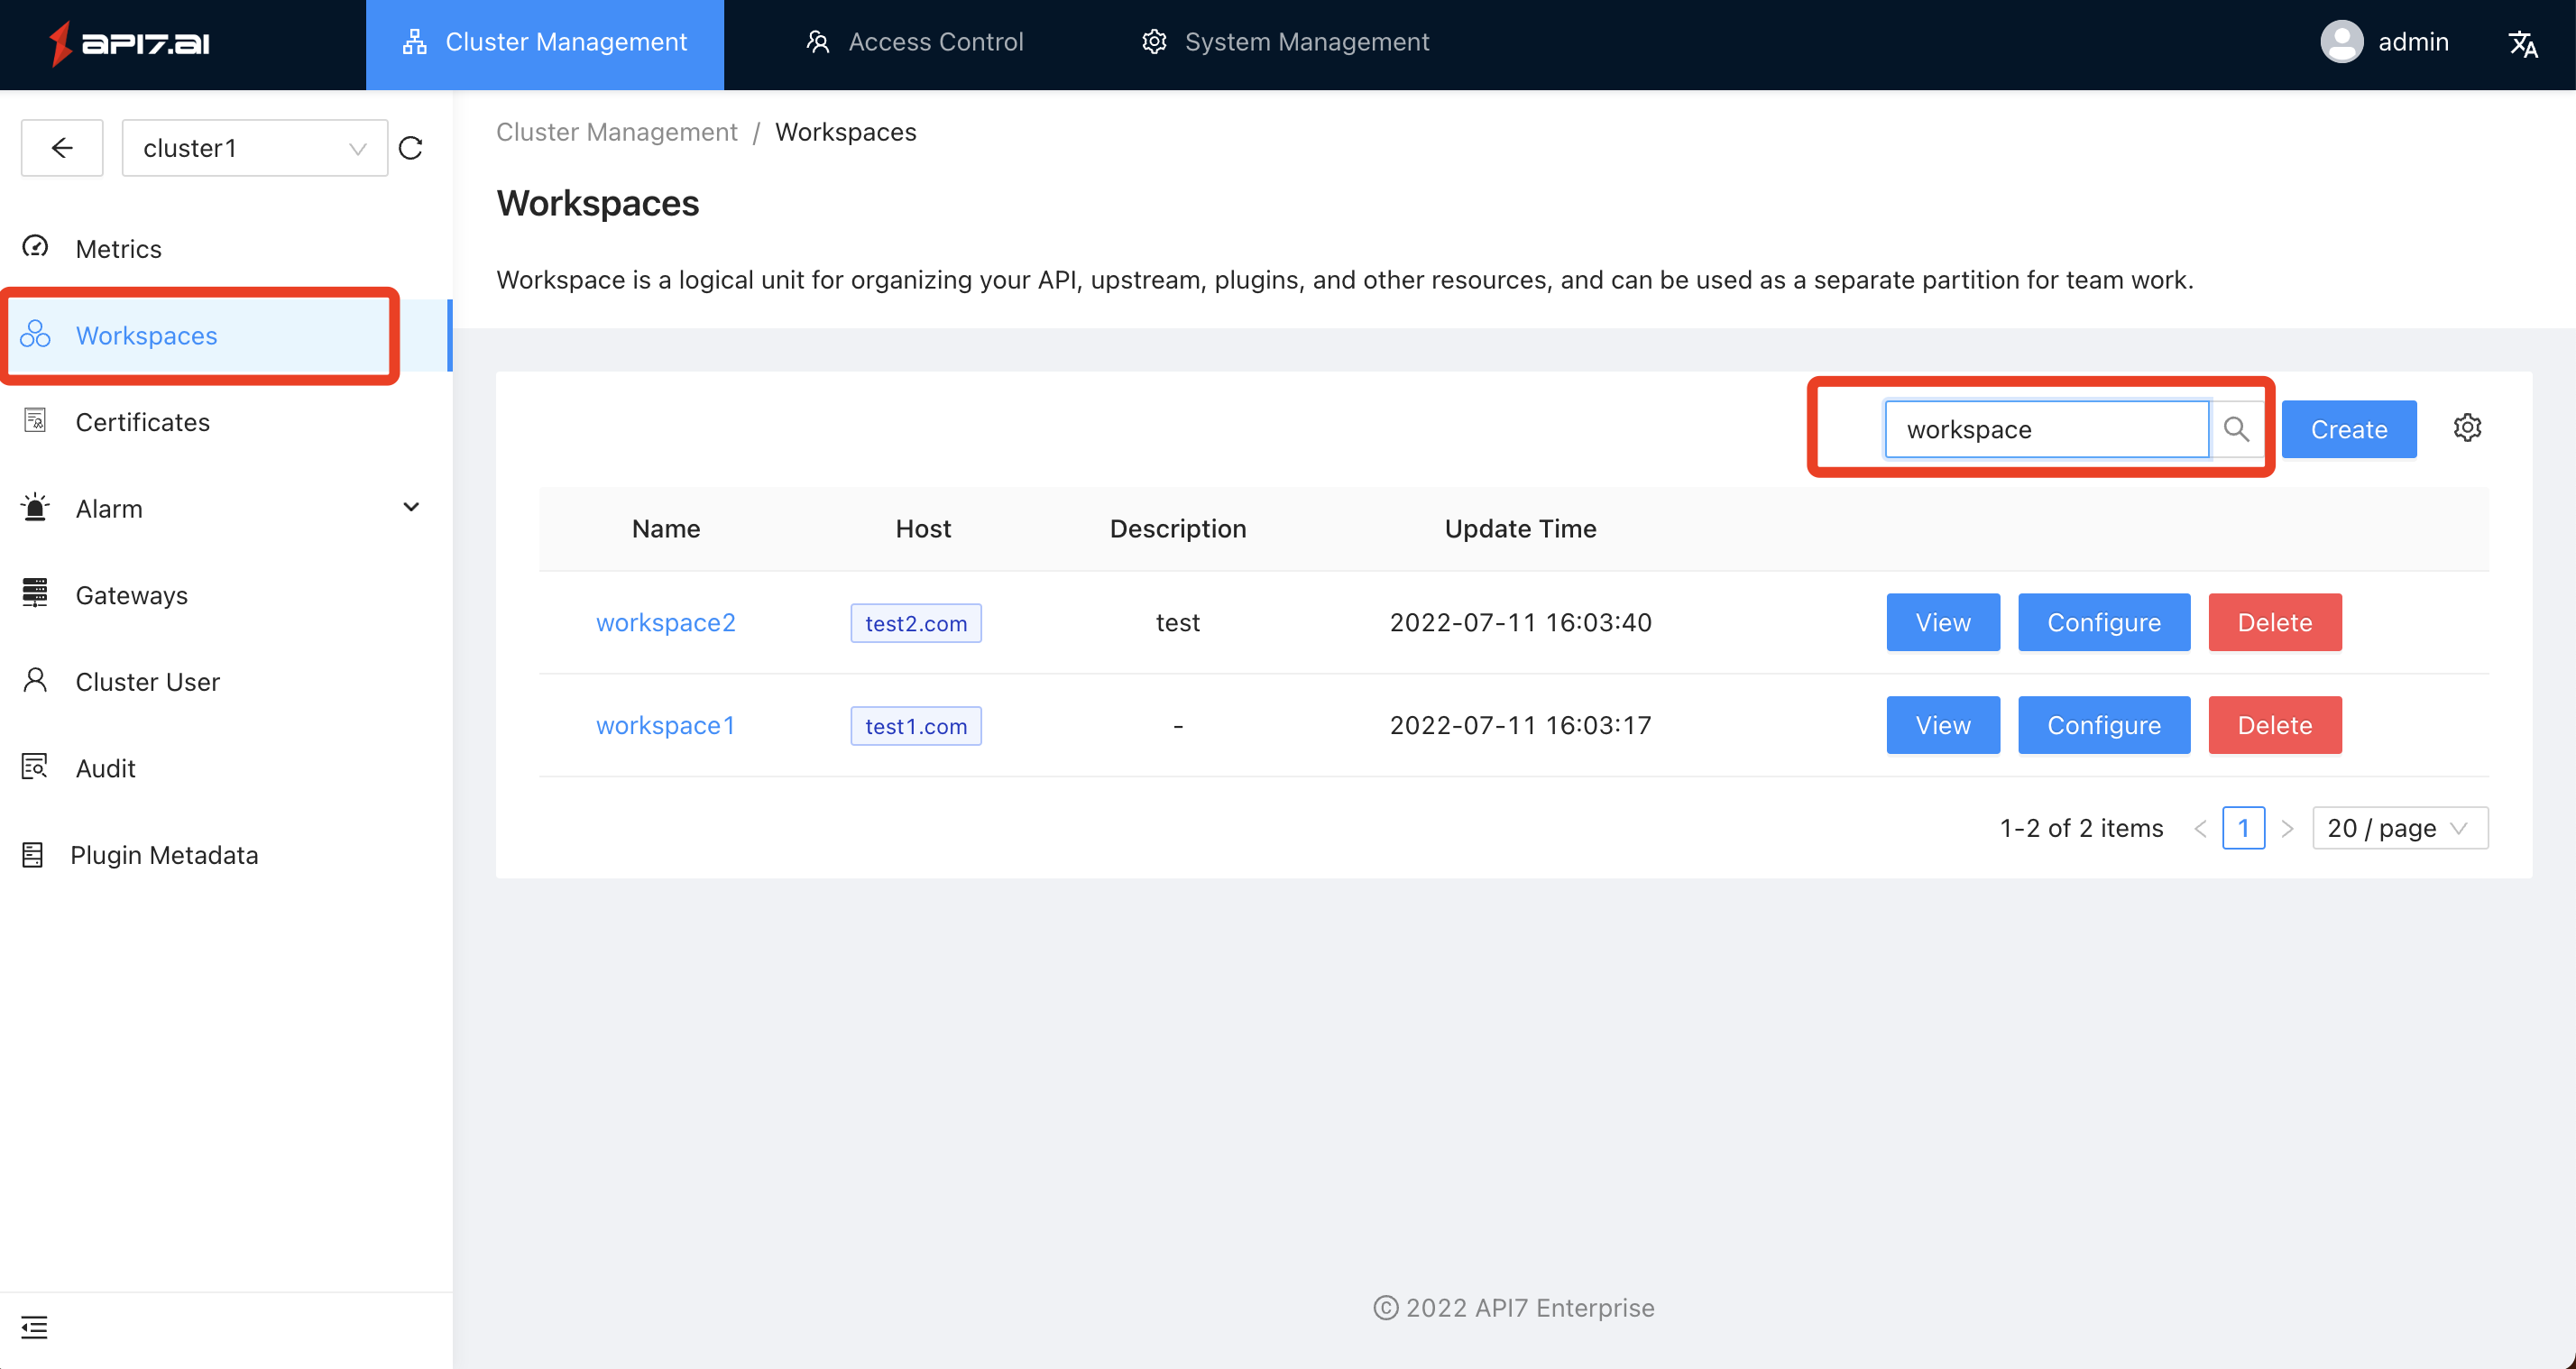
Create a workspace
If you want to create a resource:
First, you need to access the resource list, then click the Create button on the right to enter the creation process.
Modify the workspace
If you want to configure a resource:
First, you need to access the list page, then select the resource that needs to be modified, and click the Configure button on the right to enter the configuration process.
Delete workspace
If you want to delete a resource:
First, you need to visit the list page, then find the resource that needs to be deleted, click the Delete button on the right to confirm whether to delete it.
Monitoring reports
You can quickly understand the routing situation under the current working partition on the monitoring page, which includes the following indicators:
- Number of API calls;
- API average latency;
- API error rate;
- Hotspot API (Top5);
- Hot consumer information (Top5);
- Distribution of API status codes;
- ...
API Management
The route matches the request according to the preset rules, loads the corresponding plugin according to the matching result, and then forwards the request to the target upstream.
Query API
Click the API -> List option on the left to enter the API list.
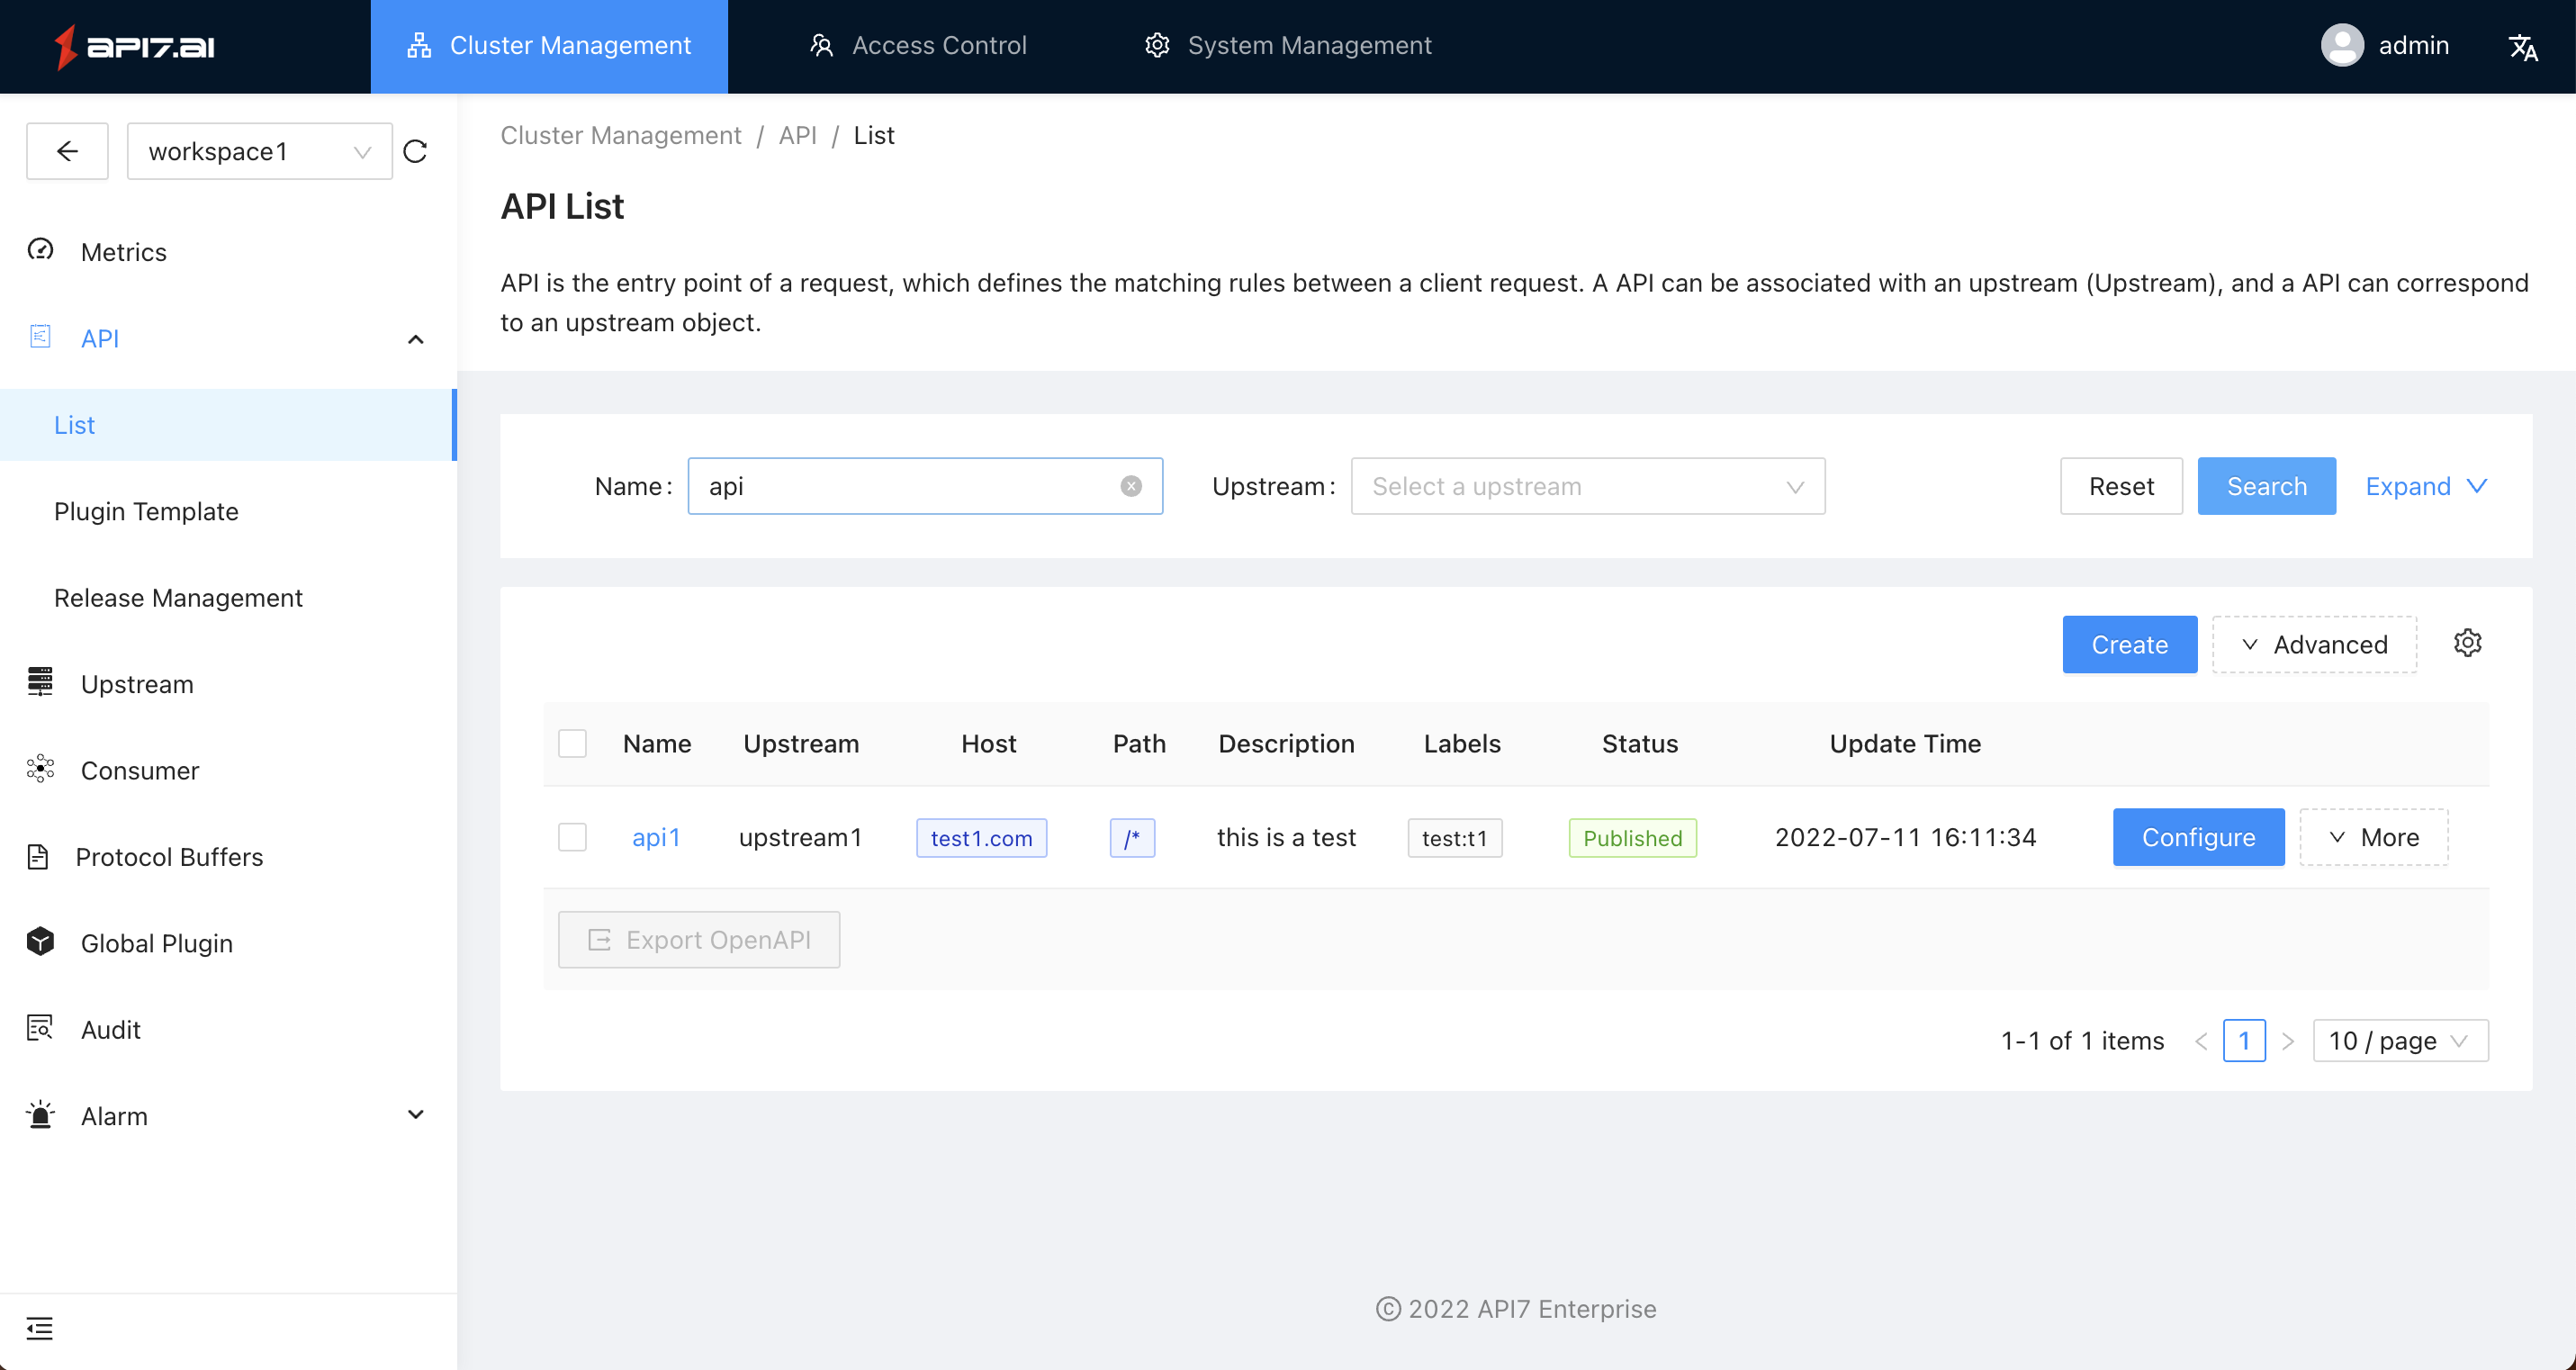
The list page will display multiple resources that have been created. Through the query area, you can query with the following parameters:
- Name
- Tags
- Status
When creating a route, the newly created label will be available as a query parameter in the search area of the list page:
Create an API
First, you need to access the resource list, then click the Create button on the right to enter the creation process.
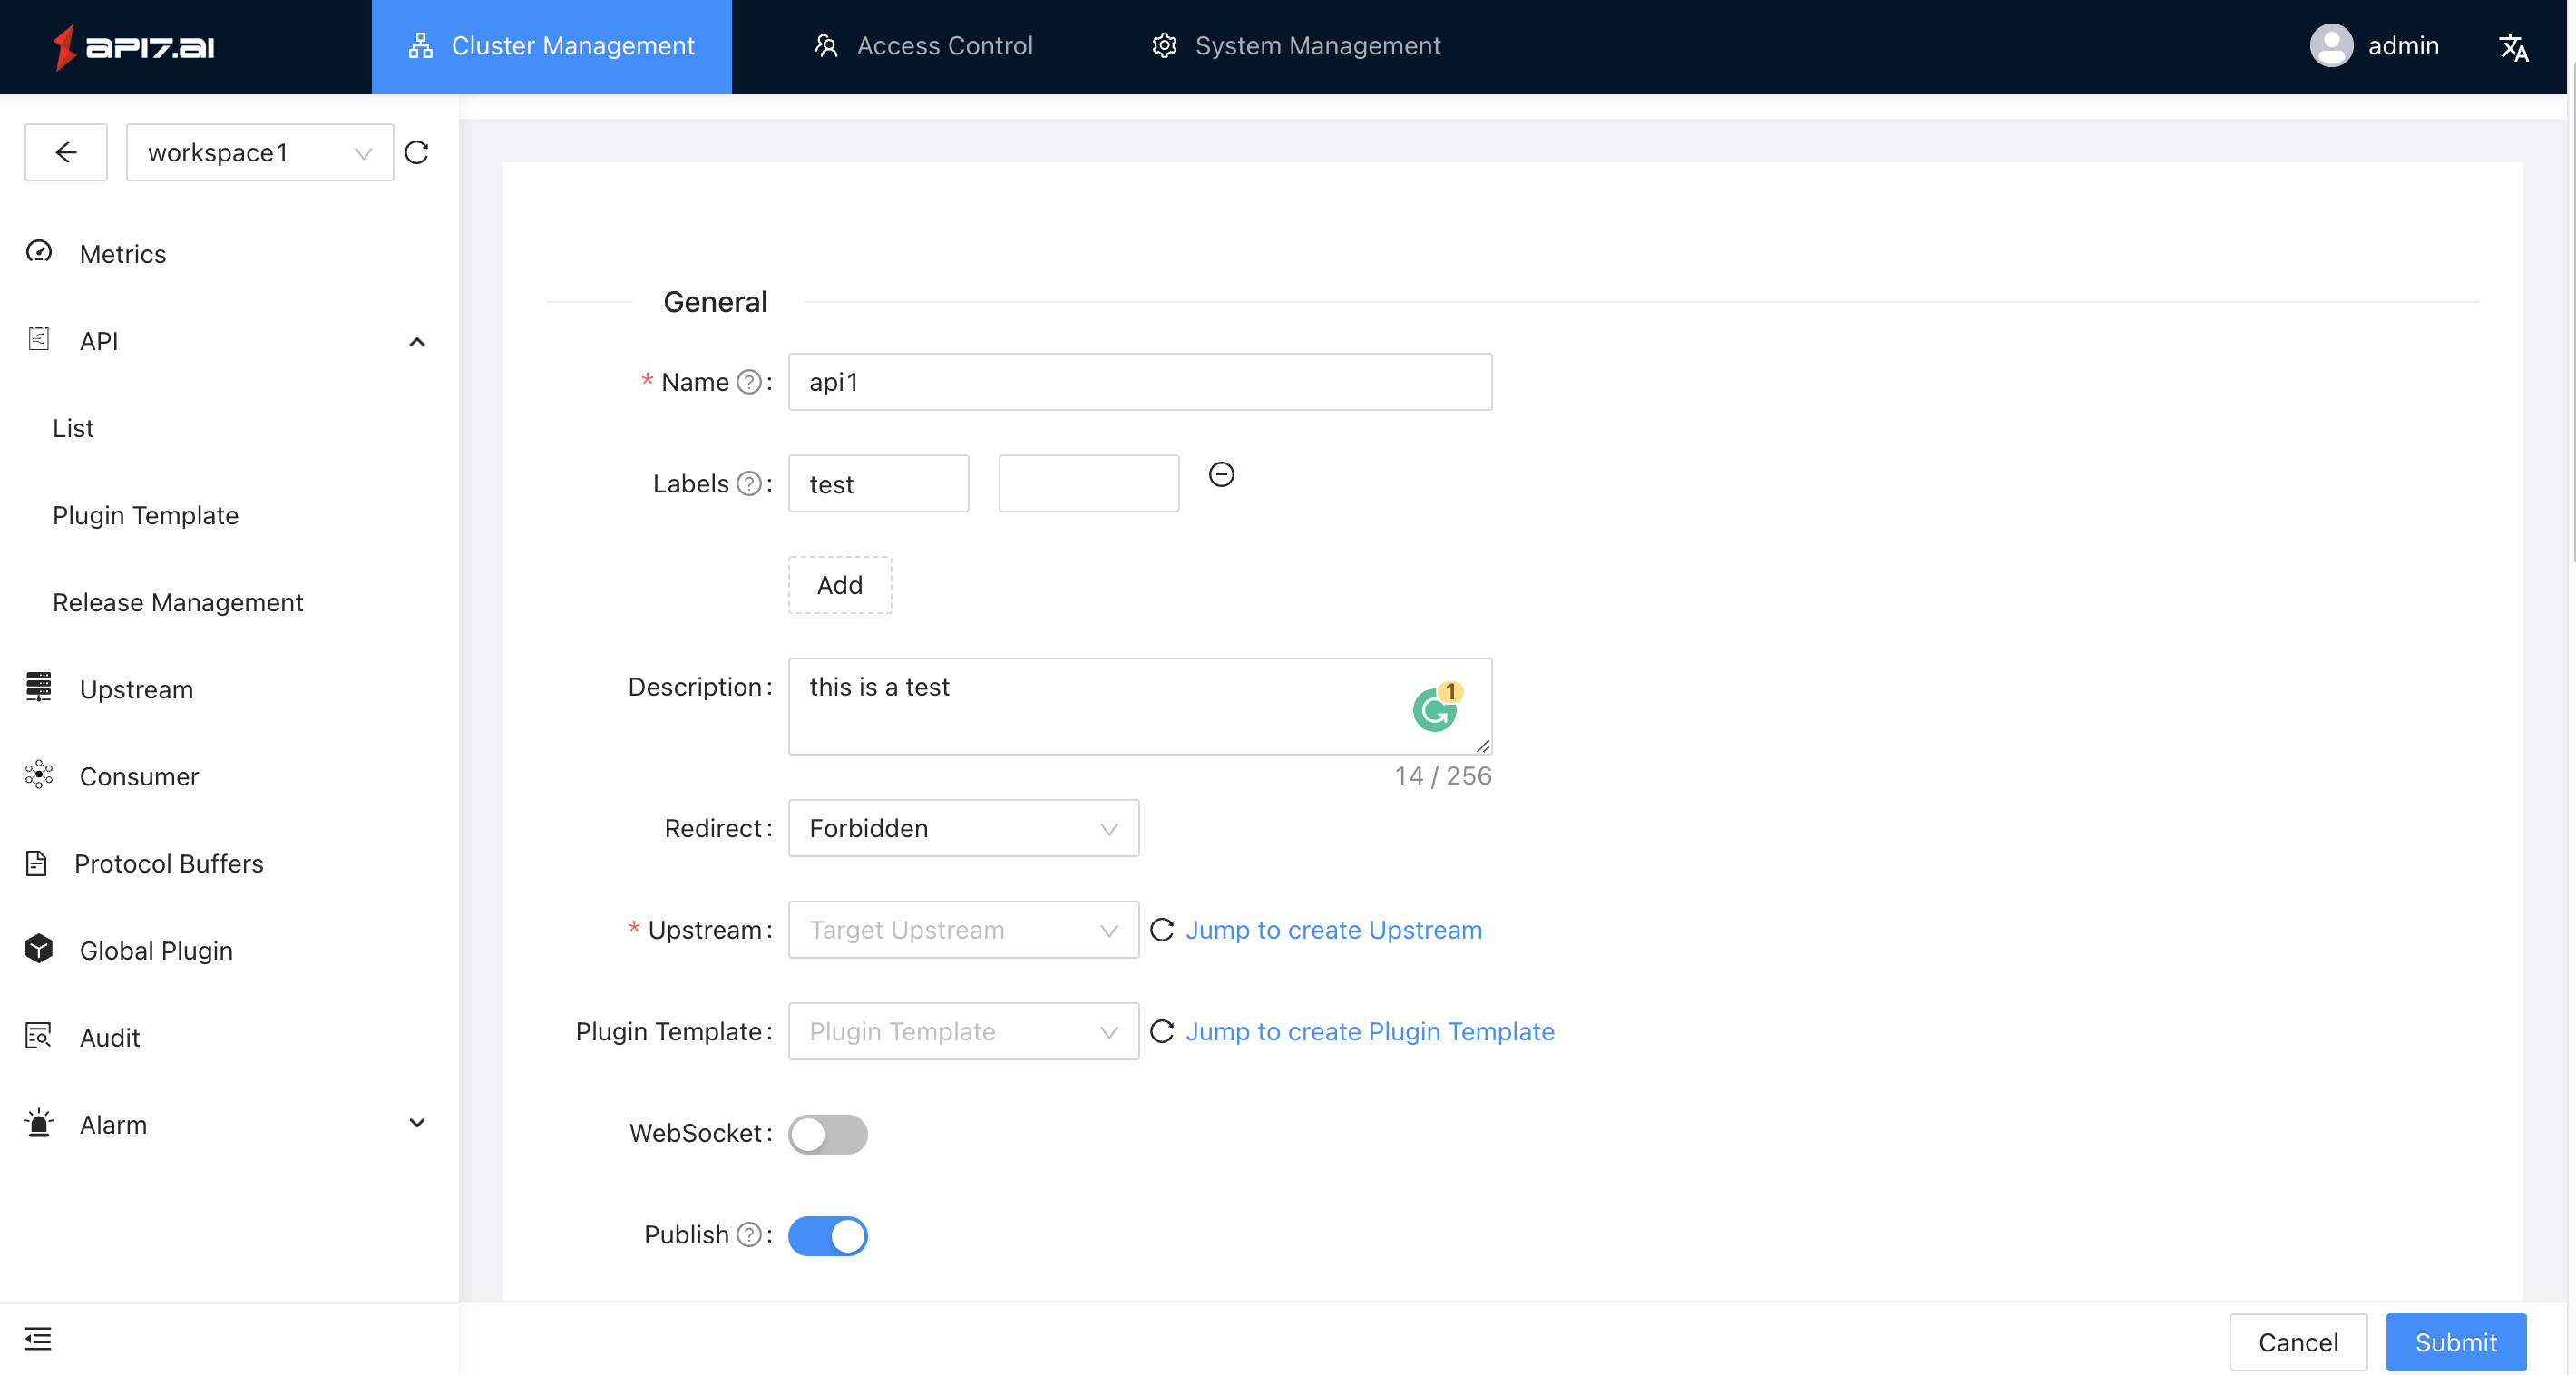
You need to add the following information according to the situation:
- Basic information: name, label, description, whether to publish, whether to redirect, bound upstream, bound plugin template, etc.;
- Matching conditions: hostname, path, client side IP, HTTP method, priority, etc.;
- Request rewriting: whether to rewrite the request information;
- Advanced matching conditions: A variety of operators can be used to set rules for request headers, request parameters, and cookie locations.
Once the configuration is complete, click the submit button to create the API.
Note: Before you create an API , you can create plugin templates, upstream services on demand, to make relational references when configuring the API.
Modify API
If you want to configure a resource:
First, you need to visit the list page, then select the resource that needs to be modified, and click the Configure button on the right to enter the configuration process.
Delete API
If you want to delete a resource:
First, you need to visit the list page, then find the resource that needs to be deleted, click the More - > Delete button on the right to confirm whether to delete it.
Upstream management
Dashboard has a built-in upstream module, and the upstream list contains the created upstream services (ie, backend services), which can perform load balancing and health checks on multiple target nodes of the upstream services.
Query upstream
Click the Upstream button on the left to enter the list.
The list page will display multiple resources that have been created. Through the query area, you can query with the following parameters:
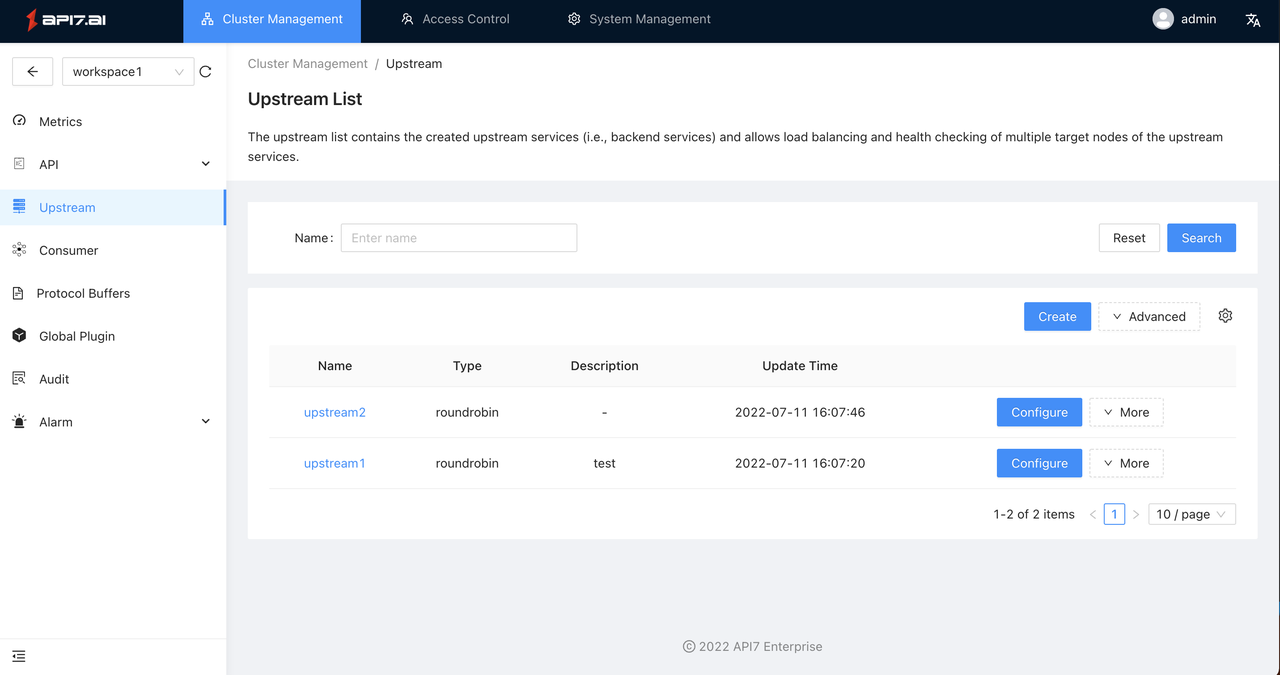
Create upstream
If you want to create a resource:
First, you need to access the resource list, then click the Create button on the right to enter the creation process.
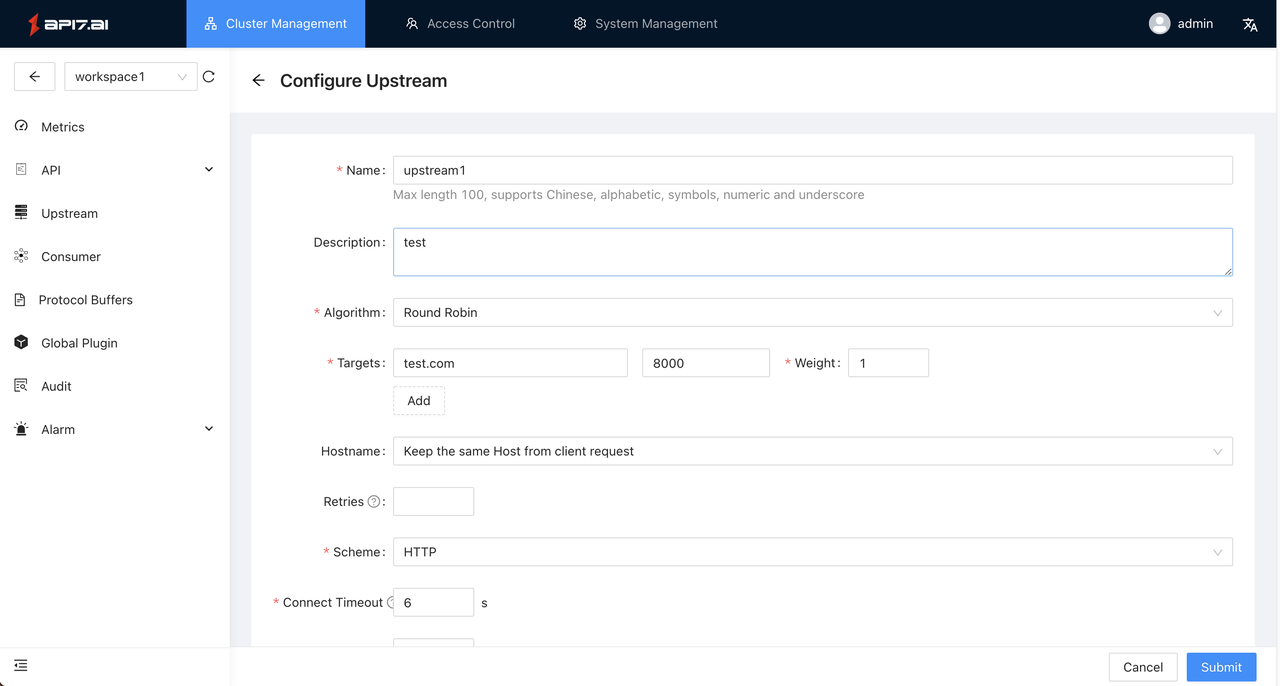
Click the submit button in the lower right corner, if the submission is successful, it will enter the list page; if the submission fails, the corresponding error data will be displayed in the upper right corner.
Modify upstream
If you want to configure a resource:
First, you need to visit the list page, then select the resource that needs to be modified, and click the Configure button on the right to enter the configuration process.
Delete upstream
If you want to delete a resource:
First, you need to visit the list page, then find the resource that needs to be deleted, click the right side More - > Delete button on the to confirm whether to delete it.
Global Plugin Rules
Dashboard has built-in global plugins rules at the working partition level. The plugins configured here will act on the routes in the working partition.
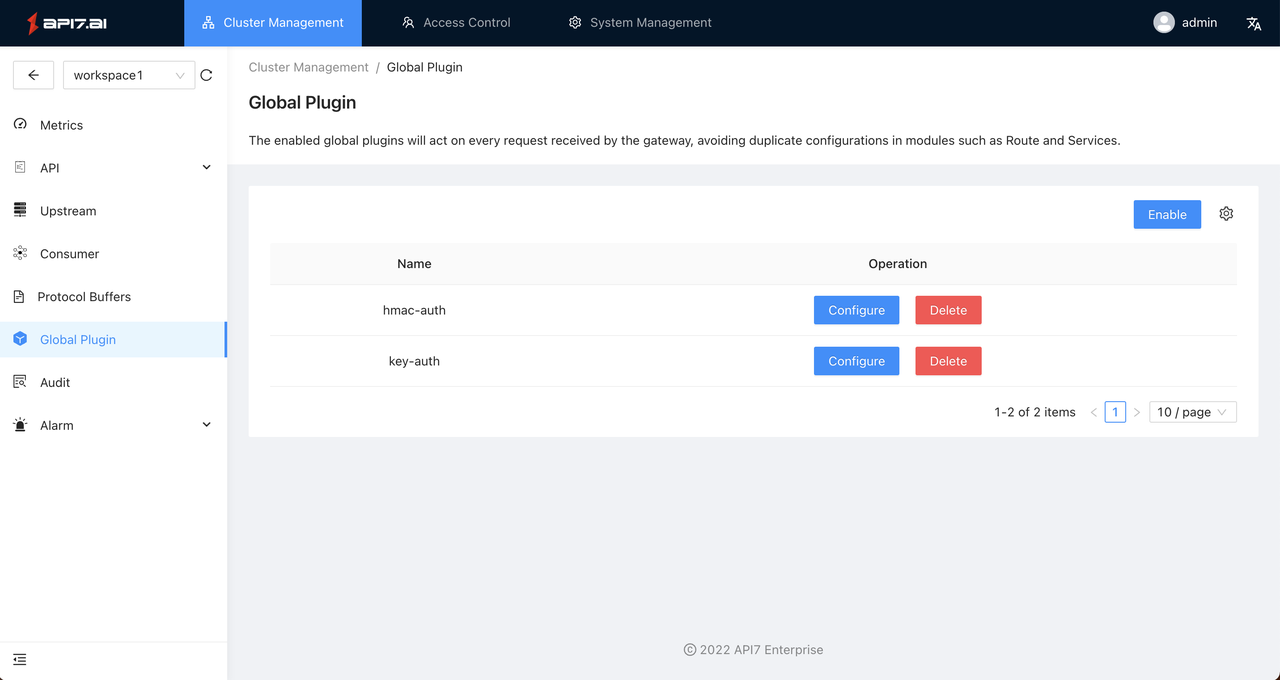
Enable plugins
If you want to enable a resource:
First, you need to access the resource list, then click the Enable button on the right to enter the creation process.
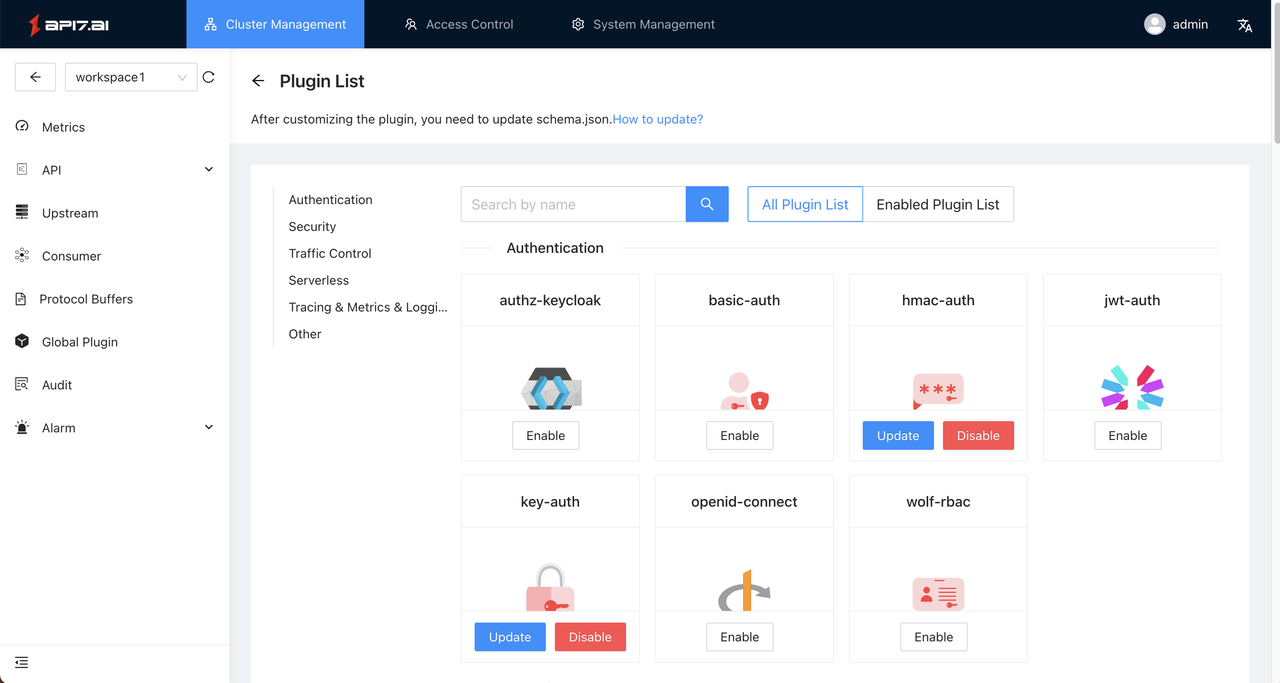
We take the plugin basic-auth as an example, it is not currently enabled. After clicking the Enable button, the plugin configuration interface will pop up, as shown in the following figure:
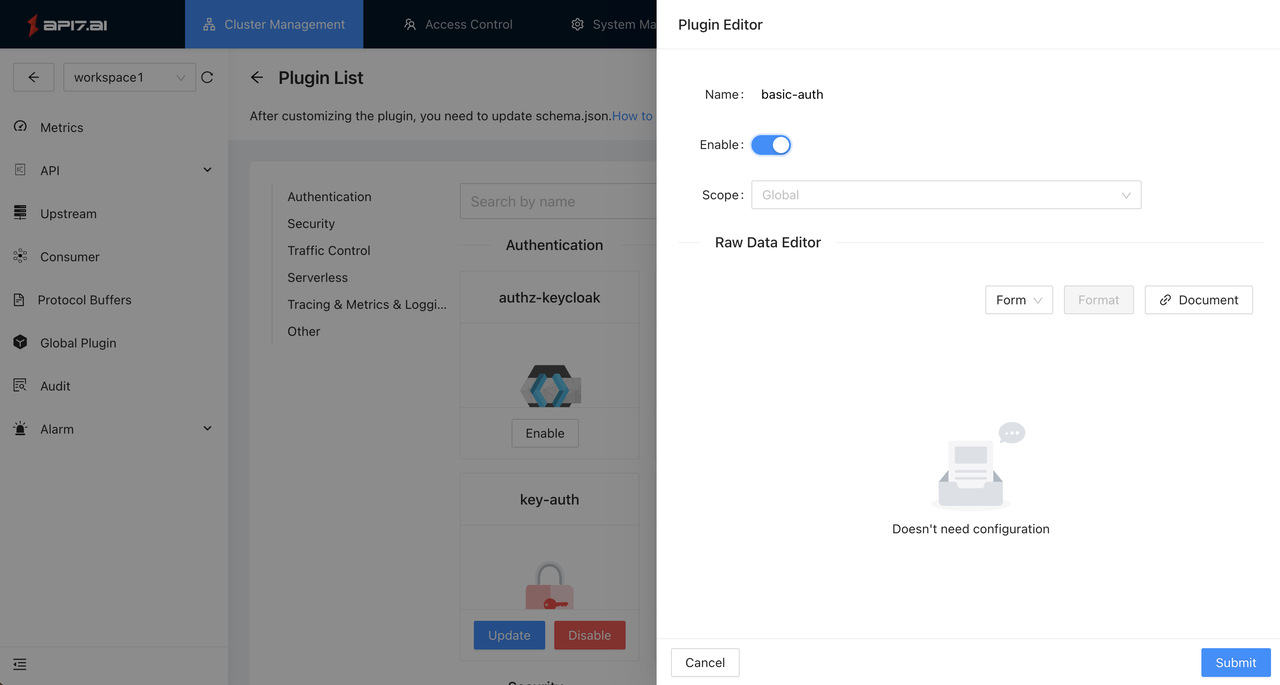
You can click the Document button to view the specific description of the plugin and configure it;
If the data is correct, click Submit in the lower right corner to submit data to the API to enable the plugin, and close the plugin configuration interface , the plugin button in the plugin market will turn blue;
If the data is wrong, a specific error message will pop up in the upper right corner, you need to refer to document to modify it.
Modify plugin
If you want to configure a resource:
First, you need to visit the list page, then select the resource that needs to be modified, and click the Configure button on the right to enter the configuration process.
Remove plugin
If you want to delete a resource:
First, you need to visit the list page, then find the resource that needs to be deleted, click the Delete button on the right to confirm whether to delete it.
Audit logs
Overview
Through the audit log module, administrators can view the operation records of resources in the specified work partition, conduct security analysis and compliance audits for operation behavior, and locate the cause of the problem and roll back the wrong operation as soon as possible when an abnormal situation occurs. The audit log module will record the changes that occur when users operate resources such as APIs, upstream services, and global plugins rules.
Application scenario
- Level protection compliance: According to the level of protection requirements, account activity records in the system should be kept for at least 180 days, and the audit log module can achieve long-term log storage;
- Operational audit: The audit log can fulfill the compliance audit requirements, and the administrator can view the user's detailed operation records through this feature;
- Security analysis: The operation audit will carefully record the user's operation, and by checking the history, it can be judged whether there are security leaks and other problems in the account;
- Change traceability: When a resource is abnormal, the audit log can help you quickly locate the problem and the reasons, also supports recording before the rollback operation.
How to use
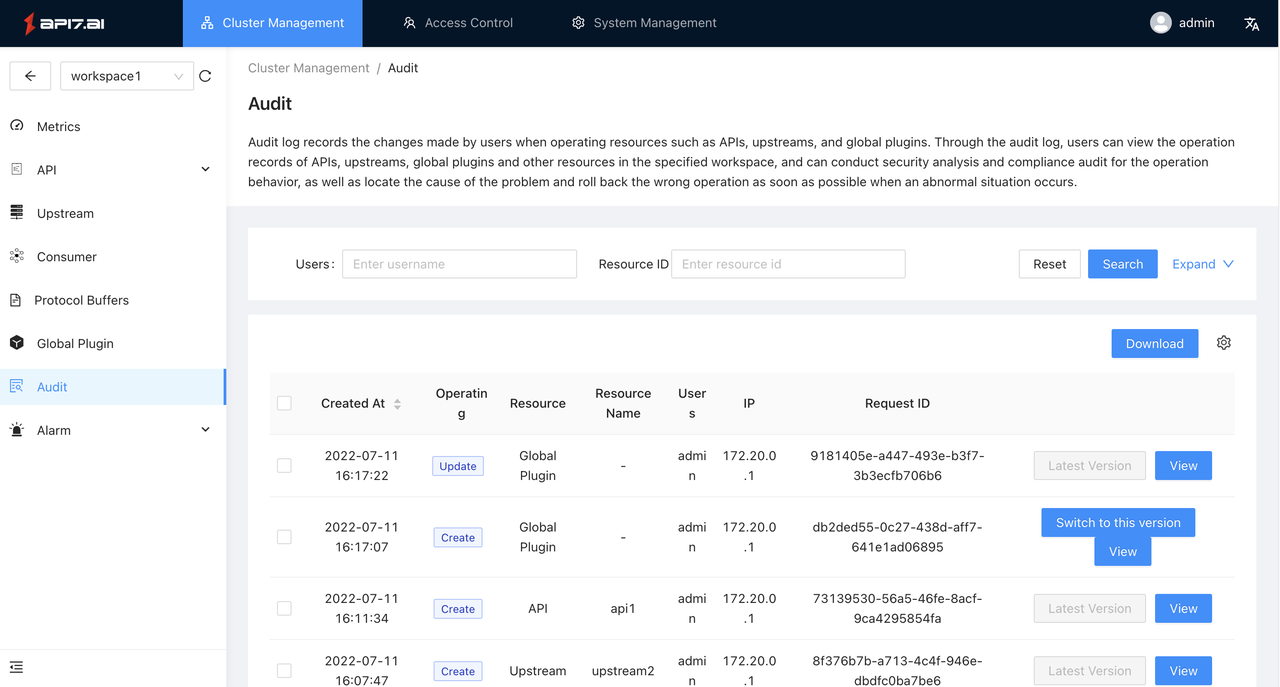
This is a screenshot of the audit log feature under a working partition, showing that the user admin has deleted a resource after the global plugin has created it.
View resource data
To view the data of the operated resource, click the Log Details button on the right side of the log record to view it ( JSON format).
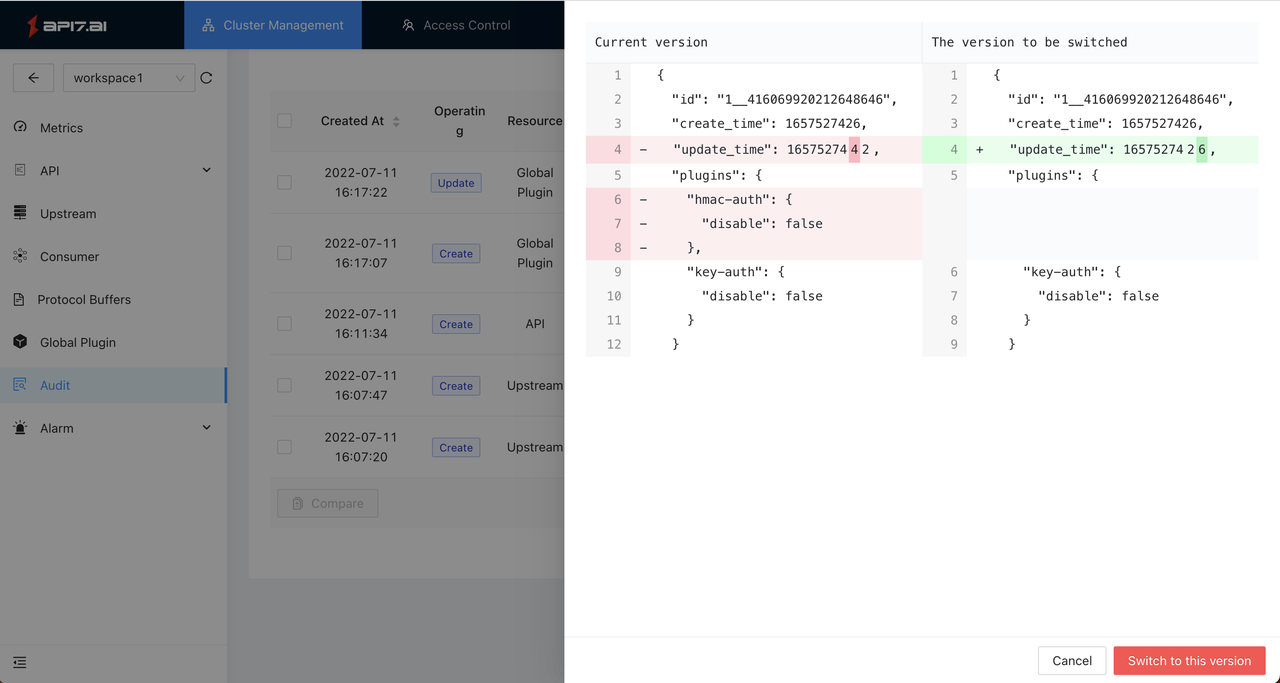
Roll back historical operations
If you need to roll back the operation, click the Switch to this version button, the different information between before and after will appear. After confirming that it is correct, click the button in the lower right corner.
Download the audit log
Click the "Download" button on the interface, and all logs will be downloaded in CSV format.
Note: Do not support downloading some logs through filtering parameters temporarily.
Alarm management
Alarm management includes 3 components of Alarm History, Alarm Policy and Alarm Notification, the administrator needs to configure the notification template and then configure the alarm policy, when an alarm is triggered, the administrator can query the history information through the alarm history list.
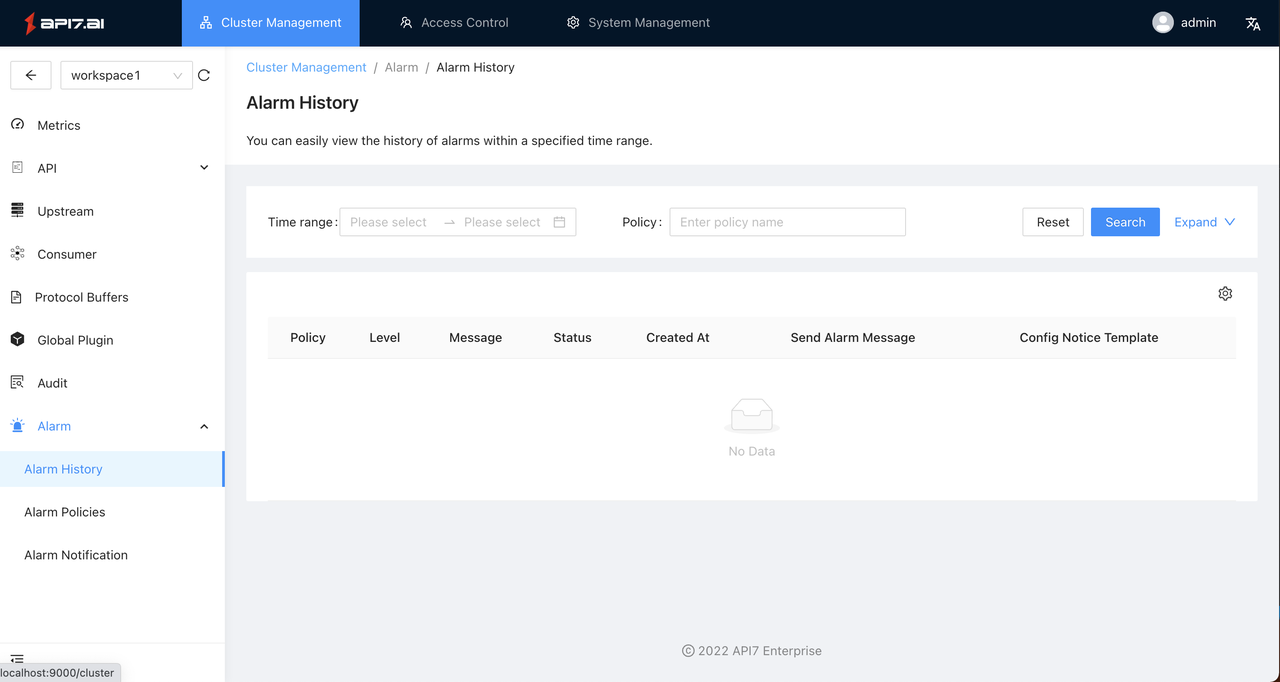
Alarm History
When the alarm rule is triggered, the administrator can view the following data through the Alarm History list:
- Which alarm rule was triggered;
- The time to trigger the alarm;
- The content of the alarm record helps the administrator to quickly locate the problem.
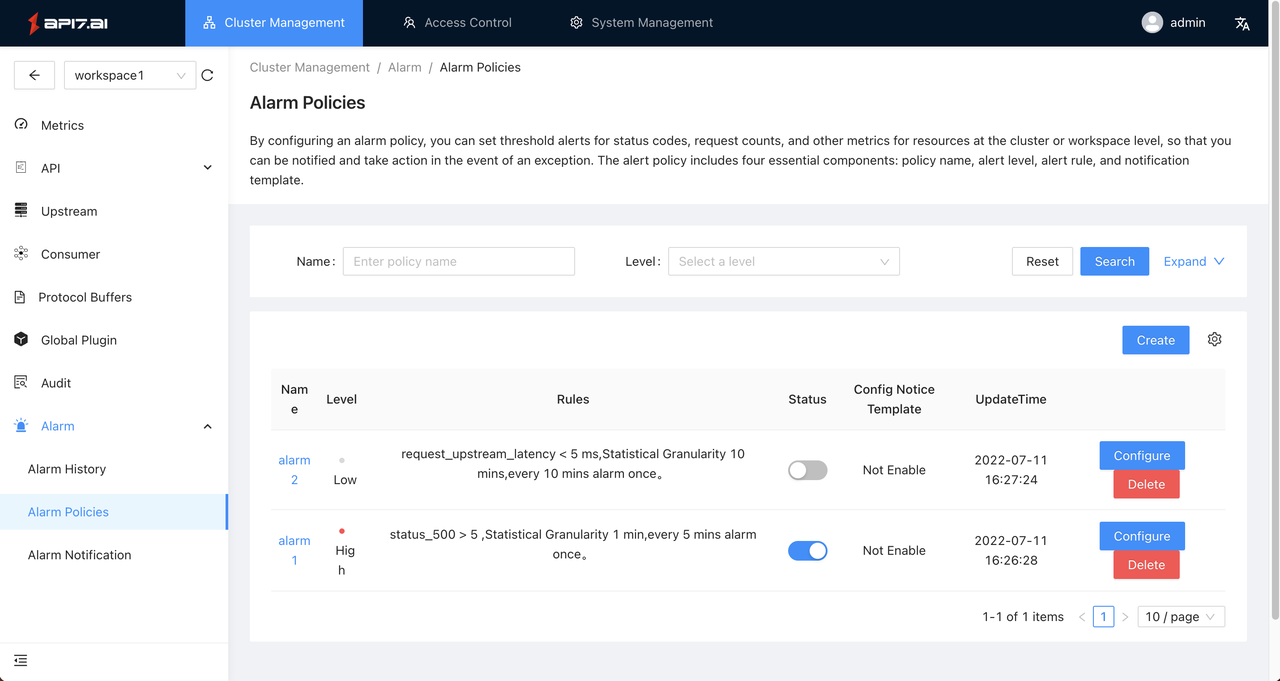
Alarm Policies
The list of Alarm Policies is used to display the currently created policies. From this page, administrators can create new alarm policies, configure policies, and enable/disable policies.
Alarm Notification
By configuring the alarm notification template, it is convenient for you to reuse when configuring the alarm policy and reduce repeated configuration.
On the Create notification template page, the administrator needs to fill in the template name, subscriber user (user in the system), notification channel (currently supports Webhook), and can be referenced by the police policy after the creation is successful. When select subscribed users, the subscribed username will be included in the notification information called back to the Webhook.